Apologize for the circumstances.
We recommend to follow the instructions on developer website: How to Import a Custom Set of Safety Cameras?
Related posts:
How do I import custom POIs on iOS?
How do I import custom POIs on Android?
Users of the new version 6 can, by the way, also use our TomTom Overlays. Find out how to do this, here: Speed Camera Updates - CoPilot Live 6 [engl.]
Please note: Since older or weaker computers currently have difficulty with the conversion of our daily, up-to-date data from the download centre, as an alternative, we offer you a static version of our database for all of Europe, which is updated at regular intervals. You can find the download (alk.zip) below the download centre. You can find the special installation guide here.
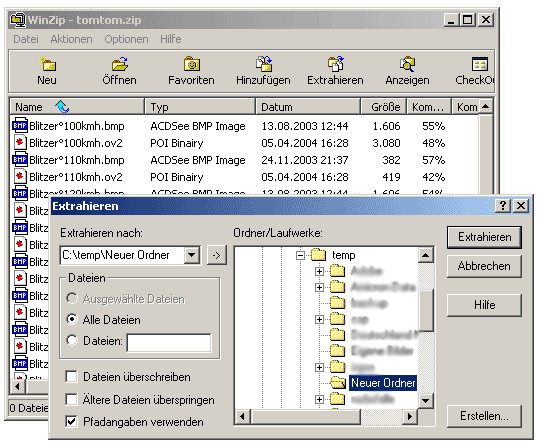
Now, please unzip the file alk.zip with a suitable program, we recommend WINZIP, see illustration:
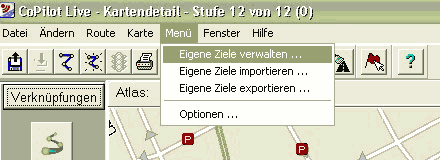
Now, open the CoPilot program and go to "Manage own destinations" in the menu.
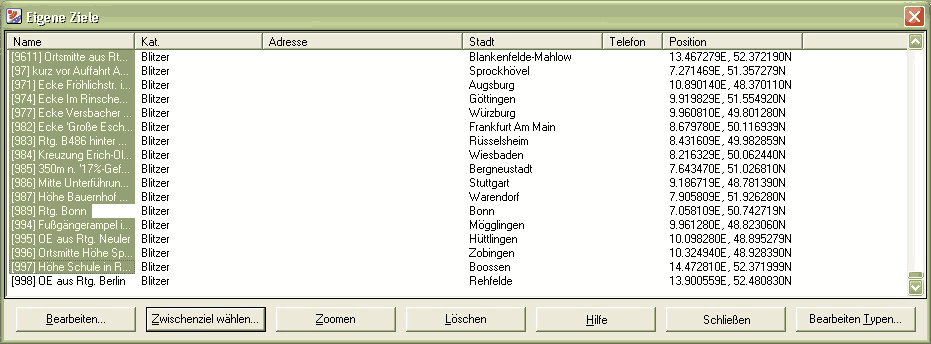
Now, delete your own destinations that now appear up to at least one destination. Don't delete that destination, otherwise the entire speed camera category will be deleted and it is very complex to restore it again (through a reinstallation). Use the SHIFT + mouse to mark up to the entry before last. Then, click "Delete" and "Exit". Repeat the request and delete action until only one entry remains. Since the memory management still has some bugs, this usually doesn't work the first time. Therefore, even if there are large volumes of data, don't lose your patience. The program is not the fastest. Deletion is important, otherwise when the new speed cameras are added, the old ones that no longer exist won't be deleted. Besides, duplicate entries can be avoided when correcting information.
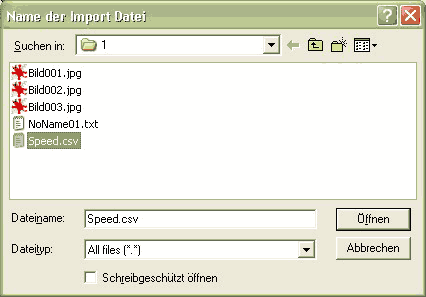
Now, we can start importing the csv file from the unzipped Zip file. To do this, open menu "Import own destinations" again. The following picture appears:
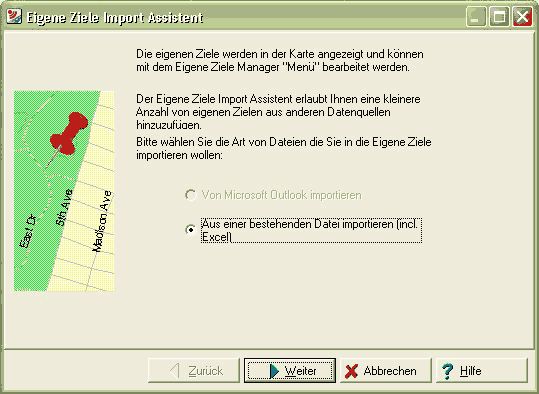
In the import wizard, click CONTINUE and SEARCH/ALL FILES and double-click the file speed.csv that we unzipped at the beginning.
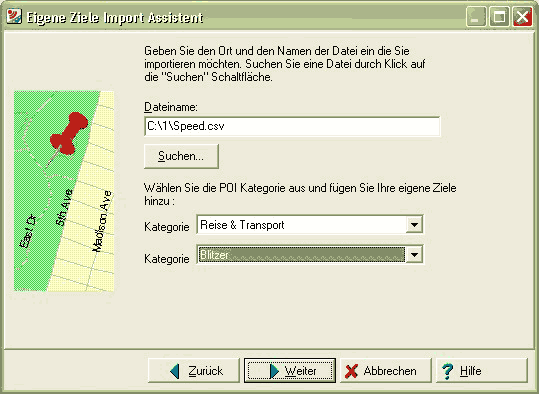
We still have to select the categories Travel & Transport / Radar traps, as shown in the following picture, and then click CONTINUE.
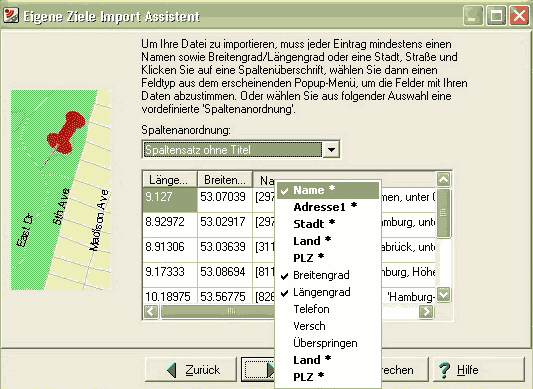
Now, we select the comma as the separator in the following menu and then click CONTINUE again. In the menu that now follows, we click the headings NAME, Address, City, and change the names as follows: Longitude, Latitude, Name.
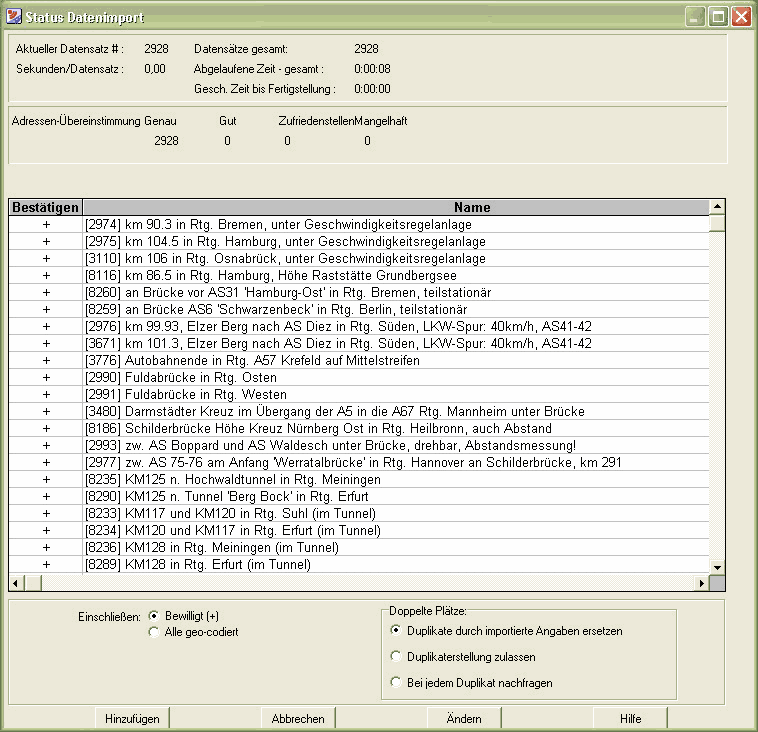
With CONTINUE, you come to a menu with which you can save the column process for the next time so that you can save doing some work. Now END comes and the data will be displayed and finally imported with ADD.
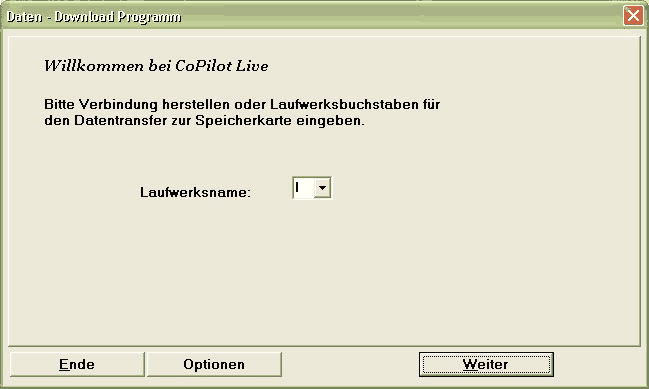
Now, all of this must still be transferred to the mobile phone with FILE/DATA Download. After entering the drive letter (the mobile phone will be recognised as a drive or you put the Transflash card in a card reader), the choice of region and END, the storage space being used will be displayed.
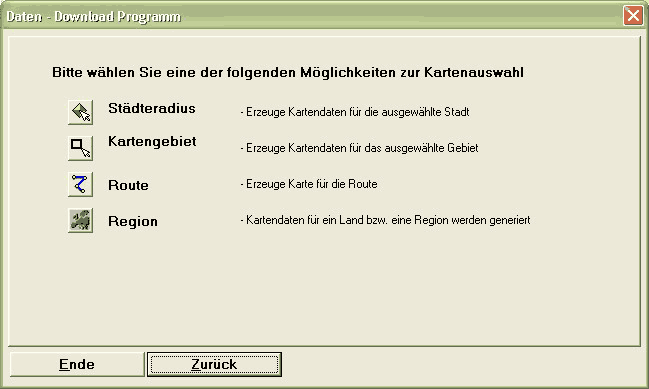
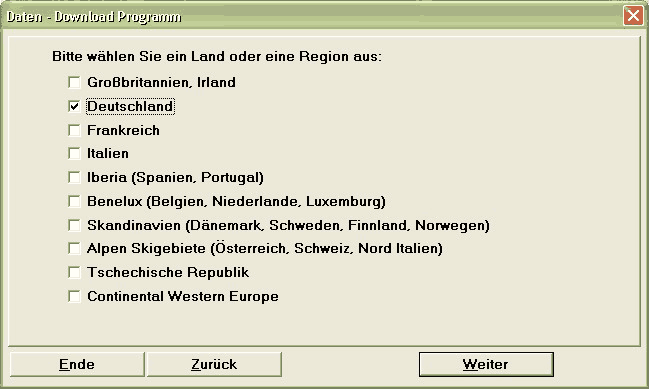

After 2x CONTINUE, DOWNLOAD, END, and then DOWNLOAD again, the card including all data will be recreated and copied to the mobile phone, or alternatively the memory card.
Now, you only have to equip the category Travel & Transport and Radar Traps with the respective warning route and it will indicate the particularly hazardous routes reliably, acoustically, and optically.
Please note: A detailed English guide with pictures can be found directly at ALK-Supportseiten.
Please unzip the file alk.zip and copy all files from the folder "Alk-Dateien..." to your mobile phone card in the folder: {Mobile phone card}:/copilot/save/